Use this link to get 70% off the Automate the Boring Stuff online video course.
Support me on Patreon


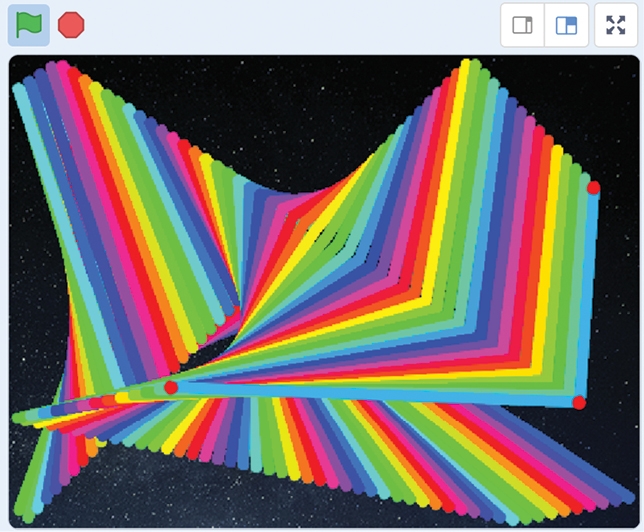
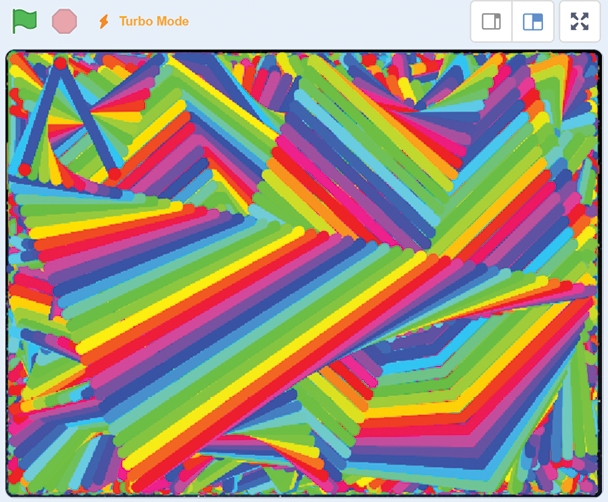
 n this chapter, you’ll create a cool-looking animation: a rainbow V that flies through space and leaves colorful trails behind. This program was inspired by the demoscene, a subculture of elite programmers who made amazing graphical programs starting in the 1980s.
Demosceners made beautiful, elaborate programs called demos that showed off their artistic, musical, and programming skills. But most amazing of all, these programs were tiny—just a few kilobytes! The program we’ll write isn’t quite as small, but it’s dramatic and colorful, and it uses only a few lines of Scratch code.
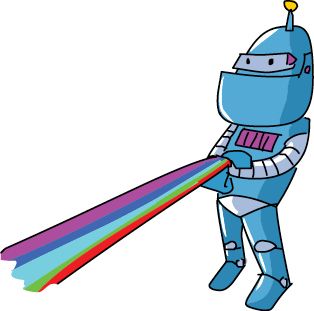
Before you start coding, look at the following figure to see what the final program will look like. Then, go to https://www.nostarch.com/scratch3playground/ to play the animation.
Just like demosceners, you can make beautiful programs. Let’s create our own graphics demo in Scratch.
The first step of turning an idea into a Scratch program is to sketch out what you want it to look like. Planning your program helps you figure out the sprites you want and how they’ll behave. I recommend drawing your ideas on paper so you can cross them out if you don’t like them and write down notes and reminders. It’s also best to keep the project simple.
When you’ve completed your simple game, you can then build on it to add complexity, which is the idea behind iterative development. First, you make the program work. Then, you make the program better. You can always add cool things to the basic program after you finish it.
Don’t worry about making the sketch look nice. It’s more important to have a solid plan for the main parts of the program. In my sketch, I have three parts: A, B, and C. We will work on these parts one at a time until we’ve built the full program.
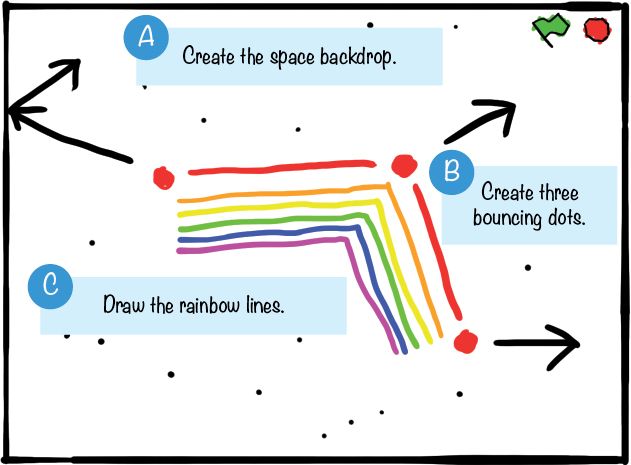
After you’ve completed a sketch of what you want your program to do, you can start programming. Go to https://scratch.mit.edu/, sign up for an account on the site if you haven’t already, and log in (having an account lets you save your programs on the Scratch website). After you’ve logged in, click the Create button at the top of your screen to start making your own Scratch project. Then, click the text field at the top to change the name of the project from Untitled to Rainbow Lines. Let’s begin by tackling Part A of the sketch.
 Create the Space Backdrop
First, let’s clean up sprites we won’t use and set a background.
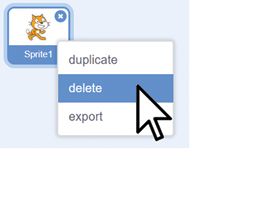
Every time you create a new Scratch project, you’ll see an orange cat sprite on a blank, white Stage. We don’t need the cat sprite for our program, so right-click the Sprite1 cat in the Sprite List and either select delete to remove the cat from the Stage and the Sprite List or click the trash can icon next to the sprite.
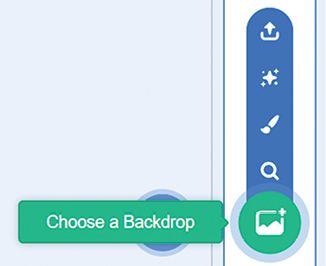
Click the Choose a Backdrop button (which looks like a landscape painting) under New backdrop.
The Backdrop Library window will open and display all the backdrops in alphabetical order. Click the Stars backdrop.
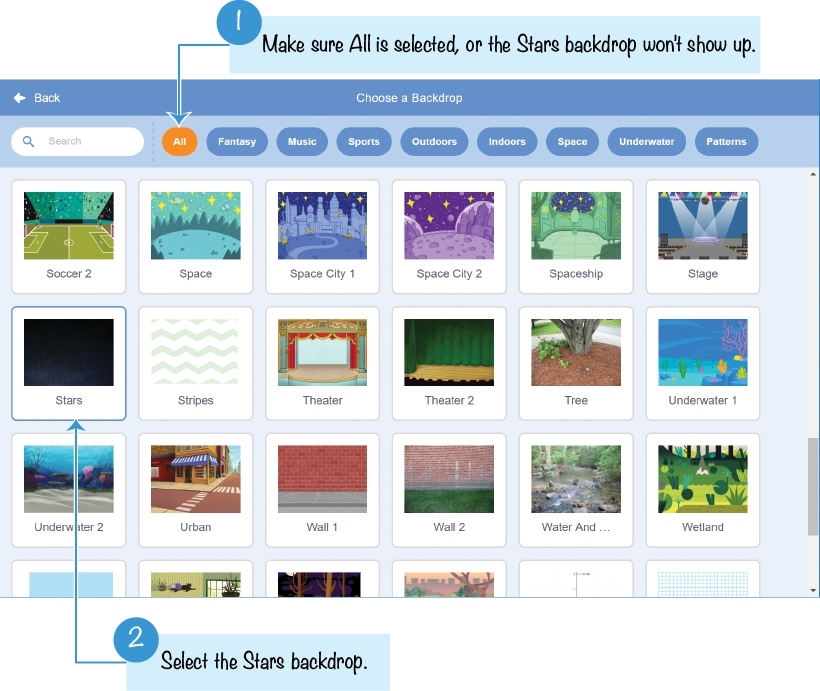
Now the Stage’s backdrop looks like outer space.
 Create Three Bouncing Dots
Next, we’ll add three new sprites that represent the three points of the flying V.
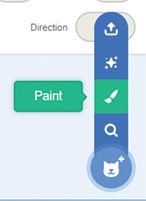
Click the Paint button (which looks like a paintbrush).
A new sprite named Sprite1 is created in the Sprite List. Clicking this button also switches the editor to the Costumes tab, which contains the Paint Editor. Use the Brush tool to draw a small red dot near the crosshairs in the Paint Editor. It might help to zoom in by clicking the Zoom button (which looks like a magnifying glass) in the Paint Editor.

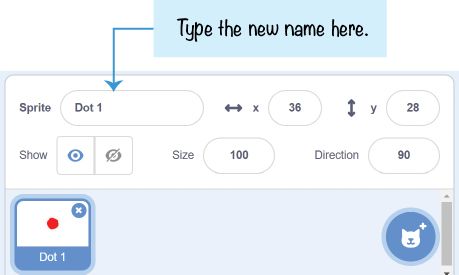
In the Sprite Pane above the Sprite List, change the sprite’s name from Sprite1 to Dot 1.
Now we can start programming. Click the Scripts tab to make the Code Area visible. Add the following code to the Code Area. You can find these blocks in the Events (yellow), Motion (dark blue), Operators (green), and Control (light orange) categories. If you have trouble understanding how to drag these blocks, view the animation at https://www.nostarch.com/scratch3playground/.
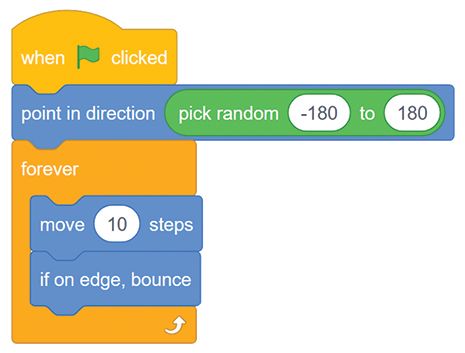
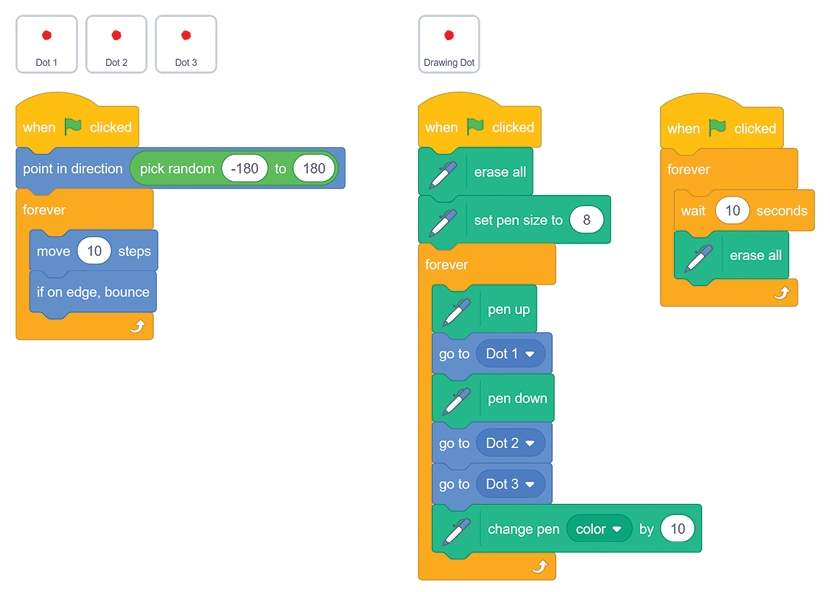
When you click the green flag, the Dot 1 sprite points in a random direction between –180 and 180 degrees. Then, the forever loop moves the sprite forward 10 steps and makes the sprite bounce when it hits the edge of the Stage. The sprite will continue to do this forever.
Notice that the Dot 1 sprite isn’t drawing any rainbow lines yet. We’ll do that later when we’ve created more sprites.
Right-click the Dot 1 sprite in the Sprite List and select duplicate. Do this twice so that you make two duplicates: Dot 2 and Dot 3. (Scratch automatically names the sprites with increasing numbers.)
 Draw the Rainbow Lines
Now that we’ve created all the bouncing dots, we can create a fourth dot sprite to draw the rainbow lines. We’ll write a program that makes this drawing dot move quickly between the three bouncing dot sprites, drawing a line as it moves. This process will repeat three times, and then after 10 seconds, the screen will clear.
This project uses Pen code blocks, which are not included in the Block Palette by default. You must click the Add Extension button in the lower-left corner of the editor and select Pen from the window that appears.
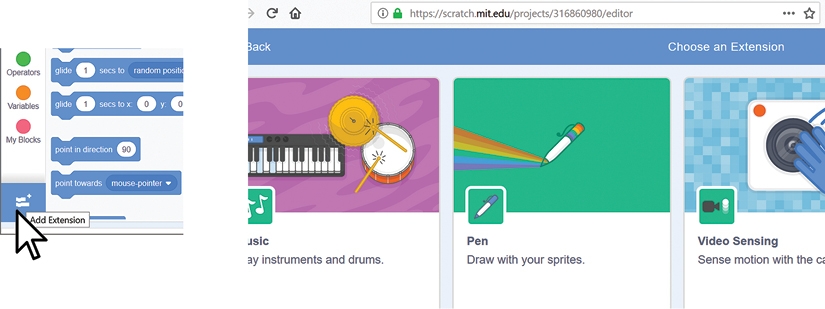
Right-click one of the bouncing dot sprites and select duplicate. Because this is a duplicate of the bouncing dots, it has some code we need to delete. In its Code Area, delete all the code blocks by dragging the when green flag clicked block (and all the blocks underneath it) to the Block Palette in the middle of the editor, where they’ll disappear.
In the Sprite Pane, rename this sprite Drawing Dot.
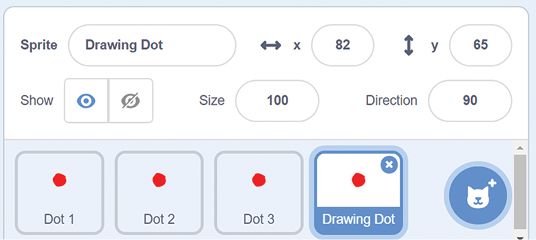
Add the following two scripts to the Drawing Dot sprite. You can find these blocks in the Events (yellow), Pen (clear), Control (light orange), and Motion (dark blue) categories. Remember, the Pen code blocks appear only if you clicked the Add Extension button and selected Pen.
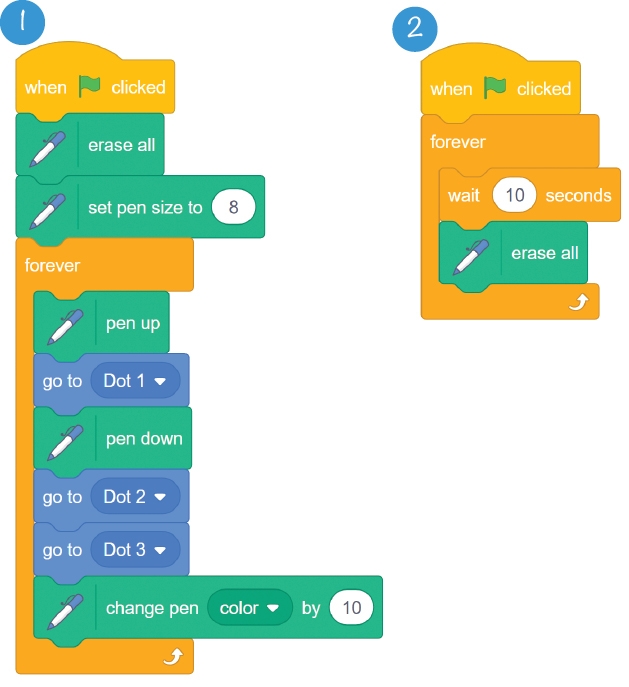
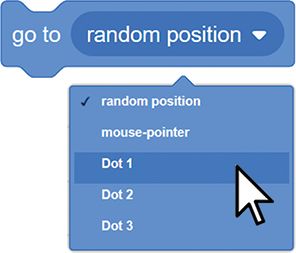
In script 1, make sure you use the go to block, not the go to x y block. Also, be sure to change the go to blocks so they aren’t going to the mouse pointer. To do so, click the white triangle on the block and select a sprite from the menu.
Before you run the code, let’s talk through how it works. When you click the green flag in script 1, the Drawing Dot sprite runs the erase all block to clear away any pen drawing already on the Stage. Then, the script runs the pen down block: as the sprite moves around, it draws a line on the Stage.
To better understand what the pen down block does, imagine holding down a giant marker on the floor while you walked around it: the marker would draw a line on the floor following you! The drawing dot goes to Dot 1, puts its pen down, goes to Dot 2, and then goes to Dot 3. Next, the change pen color by 10 block changes the color of the pen slightly. (You can increase this number to make the colors change faster.) At the same time, the Dot 1, Dot 2, and Dot 3 sprites continue to move around on their own. So the V line that the Drawing Dot sprite draws also moves around.
Script 2 is a lot simpler to understand. This code waits 10 seconds and then clears the screen of any marks made by the Pen blocks. Now the Stage won’t become overcrowded with rainbow lines.
The final code for the entire program is shown here. Notice that the code for the Dot 1, Dot 2, and Dot 3 sprites is identical. If your program isn’t working correctly, check your code against this code:
If you hold shift while clicking the green flag, you can start the program in Turbo Mode. The computer is usually able to run code blocks quickly, but a program that draws sprites to the screen slows down the computer. In Turbo Mode, instead of drawing the screen after each code block, Scratch draws to the screen only after several code blocks. Human eyes won’t notice the skipped drawings, and the program will look like it’s running faster.
shift-click the green flag to run the Rainbow Lines program in Turbo Mode. Almost instantly, the screen fills up. To end Turbo Mode, shift-click the green flag again.
In this chapter, you built a project that
pick random block to point a sprite in a random directionThis project is a demo that users can watch but can’t control. In Chapter 3, you’ll make a maze game that lets players interact with the program by using the keyboard. This will be the first real game project in the book.